
PDF/PRINT
Roles: Appointment Secretaries, Administrators, Commissioners.
Process overview: This process allows users to edit a member’s role when it is pre-provisional or provisional and to progress the appointment process for that role. This includes updating the ‘Line Manager Approval’, ‘Appointments Advisory Committee Approval’ and ‘References’ sections.
Please note: Users will not be able to validate the ‘Getting started modules’ to make the role full, unless they hold a Training Manager or Training Administrator role.
Process: Editing a pre-provisional and provisional role
Ensure you have selected the correct role from the ‘My roles’ selector at the top of the page. (This will be the role that gives you the appropriate access rights to complete this process.)
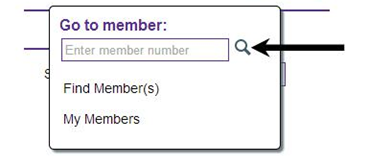
- Hover over the magnifying glass icon at the top right of the homepage.
- Type the membership number of the member you wish to edit into the ‘Go to member’ box, then click the magnifying glass next to the box. If you do not know the membership number, you can use the basic or advanced search options instead. (Please see separate user guides for using the ‘Basic search’ or ‘Advanced search’.)
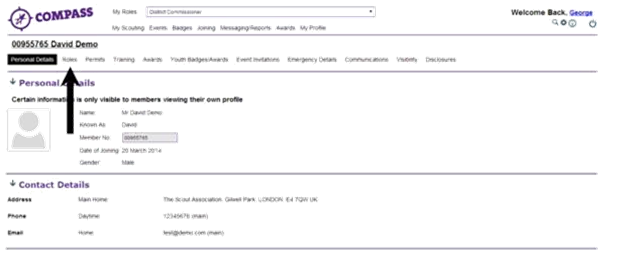
- On the member’s profile page there will be a row of headings going across the page underneath the member name and membership number. Click the ‘Roles’ heading.
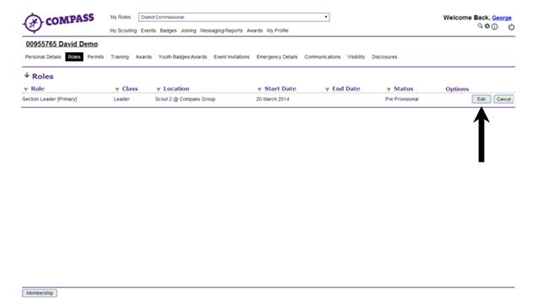
- On the ‘Roles’ page you will find a list of the member’s roles going down the page. At the right hand side of the page, each role will have an ‘Edit’ button under the ‘Options’ column. Click ‘Edit’ next to the pre-provisional or provisional role you wish to edit.
- A popup window will appear titled ‘Edit member role’, which shows the member’s name and membership number underneath. Along the left hand side of the window there will be a menu containing the headings for each of the different section pages within the process (eg Approval.) Clicking on the headings will take you to that section page.
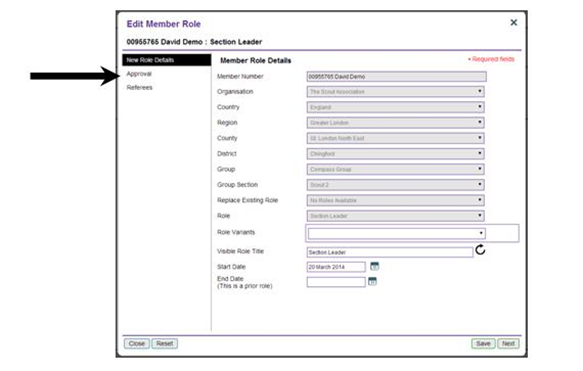
- In the ‘Member role details’ section you will be able to edit the start date of the role and enter an end date if the role is historical. If the role has a variant you will be able to use the ‘Role variant’ drop down menu to change the variant for the role if needed.
- Click ‘Next’ at the bottom right to move on to the ‘Approval’ page. This page is split in to three sections. The first section, ‘Approval process’, shows the status of the role, the line manager’s name and the review date. The ‘Line manager’ field should automatically show the line manager for the role. If there is more than one member who could be line manager, they will all be listed as separate options and can be chosen accordingly. If the box is grey there is currently no line manager recorded on Compass for this role. This information will update automatically once the line manager role is added to someone’s record. The review date can be updated by typing into the box or by using the calendar icon to the right.
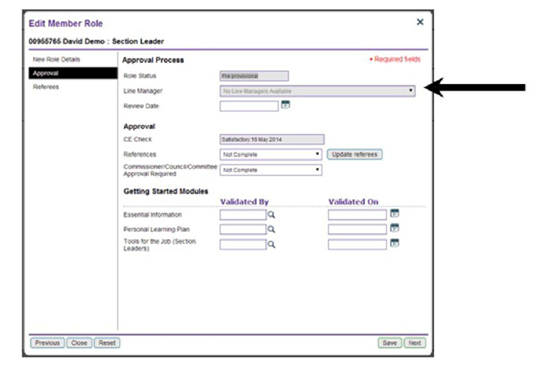
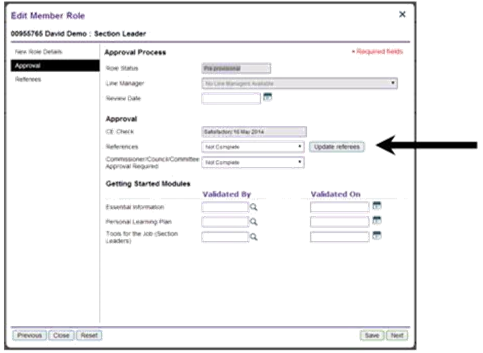
- The next section, ‘Approval’, contains information such as the status of references and the relevant Commissioner’s approval for the role. Use the drop down menu for each option to update the status. The information contained on this screen will vary depending on the role that you are editing. If a disclosure is required for this role (in England and Wales only) you should follow the ‘Completing a Disclosure Application (DBS) Option 1’ or ‘Option 2’ user guides.
- If the role requires training, the final section will be ‘Getting started modules’. Once the member has validated the relevant modules with their Training Adviser, this section can be completed by entering the validator’s membership number and date of validation. Updating the modules here will also update these modules on the member’s ‘Training’ tab, and vice versa.
Please Note: These boxes can only be updated by those who hold a Training Manager or Training Administrator role.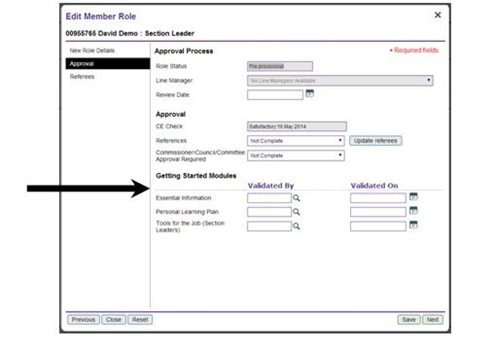
- Click the ‘Next’ button at the bottom right of the screen, or the ‘References’ link at the left hand side, to move to the ‘References’ page. The ‘References’ page is split in to two sections, one for each reference; the process is the same for both.
Complete the boxes ‘Name’, ‘Email address’ and ‘Respond by date’ for each referee. The respond by date is the deadline for returning the reference.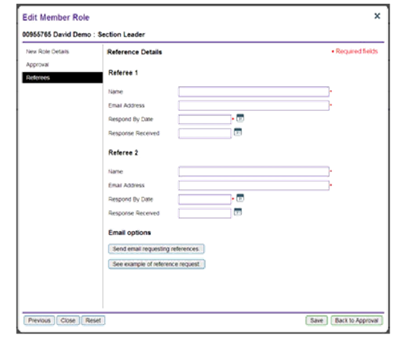
- At this point you will be able to send the email to the named referees asking for a reference. To do this, click the ‘Send email requesting reference’ button at the bottom of the window. If you want to see an example of a reference request, click the ‘See example of reference request’ button.
Once you have clicked the ‘Send’ button, a message will appear in its place telling you that you will need to click the ‘Save’ button before the reference email will be sent. You will then be returned to the individual’s roles page. - Once a satisfactory reference has been returned, place the date in the ‘Response received’ box.
- When you are ready to save the edits you have made click the ‘Save’ button at the bottom right of the page.